Hey! I've got some new statistics that proves my theory! :D If you start designing some textile bags made out of old skirts you will realize that the productivity will go down with 30% and the price of the textile bag will go down with 50%, which means you can win 50% more and faster, compared to making it without recycling.
When you start tailoring some textile, you need to calculate each and every part, or make your own template. The problem with the template is that the bag won't be unique. The other problem is the sewing, you need to sew a lot and detailed. If you start tailoring a skirt you can see that all you have to do is sew around bottom without calculation. Or you can tailor and drape a little the upper part and you saved a lot of energy and work.
The raw materials for one bag costs around 6 Euro plus the productivity (I calculated ~4 euro for productivity, because you need 4 hours minimum to make a bag like this and the price for one hour productivity is ~1 euro if you are working with household appliances, because they are working on 220V thus using less energy). If you're working with used recycled materials, you don't have to pay for the raw material, that means you won 4 euros (not counting the costs for the consumed thread, ribbon, etc.). Starting from recycled skirts means less work, which also means that the time spent doing it is about 3 hours, which equals three euros. In this way you win 50% profit.
Now imagine this in mass production.
Nowadays textile is not recycled but burned, which, beside wasting textile, obviously isn't healthy for environment. There's only a single company in England named Junky Style that specializes in textile recycling, but even they aren't doing it in mass production. 60% of mankind is wearing used clothes. 20% percent has at least one cloth they wore a single time and thrown away for a never upcoming possible later use.
Here's a tutorial on how to do such a bag:
What you need is:
- an old skirts
- remained materials from other projects you don't need any more
- lace band, ribbon and buttons for decoration
- zipper or other supply for the closing of the bag
- thread, sizer
- your sewing machine
You most probably have all these supplies as a leftover, so you might not need to pay a penny for it.
Step 1: Take of the zipper.
If you want, you can use the zipper for closing up the bag.Step 2: Cut the top of the skirt.
You need to cut the lining from the skirt and tailor it as the inner part of the bag.Step 3: Design the interior of the bag.
As the first step you need to iron the lining. You can see that the lining is ugly and curvy, to correct this you need to fold in two, draw a line on the material and sew all the way along it.
When you finished up with the lining correction, create the pocket. Calculate approximately how big you want the pocket and make a square. When you finished up with cutting, sew the upper part of square with a double folding. Then mark on the lining the square and sew all around.
When you finished up the interior design of the bag start designing the exterior.
Step 4: Make the exterior of the bag.
Fix the bottom of the skirt and make a half circle for the form of the bag. Cut down the leftover.
From the center calculate a distance which will becomes the volume / thickness of the bag. In this case 14 cm.
Than fold the material and calculate 3mm on horizontal and 6mm vertical direction.
Draw a line like this, and sew along it to make the corner of the bag.
When you turn it inside out you can see that the sewing line continues. Be careful when you fix or sew because you can lose from the quality.
Drape the upper part, it looks more esthetic and feminine.
Step 5: Assemble the exterior part with the lining.
Step 6: Design the handler.
For start you need to measure yourself to see how long you want the handler. In my case it was ~60 cm. On the chosen material draw a rectangle 60 cm long and 10 cm wide and cut it out.
Make the rough shape of the handler with needles.
Iron it.
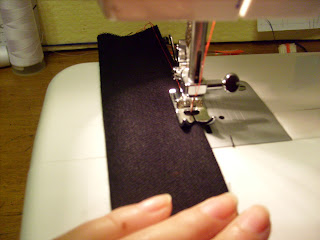
And finally sew it.
For the upper side of the bag you need approximately 10cm to give place for the decoration. To accomplish this, you need to draw four rectangles with the same measurements: 10cm x 40cm
As you cut it out apply hardening with your iron.
Then sew it.
Step 7: Connect the bag with the handler.
When you finished the upper part of the bag, apply you ribbon and lace band. Assembly your handler with the upper part. If you want to add some zipper for the closing you can do it. but I personally don't use zipper for bags because it annoys me.
Step 8: Finishing touches
After I finished the bag I realized that it's too plain and empty and so I need to add something more to it. So I applyed some buttons for the contrast and to make it more esthetic.
Here is the final result :D! I hope you like it and that you enjoyed this little tutorial. My request to all of you is to start recycling and not wasting! ^^


1 comment:
http://6perc.eu/perc.php?id=1004
:D
Post a Comment